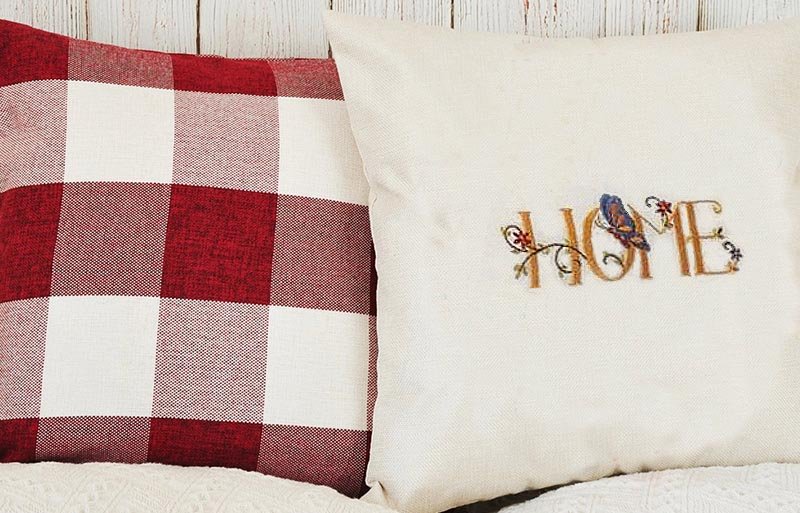
In this project we customize the common home theme for traditional embroidery. This lovely embroidery may have various uses. I would put it on the pillow and place on my favorite piece of furniture like an armchair where I am relaxing during long winter evenings. It would be also a perfect present for an old best friend or maybe for the family moving into the location beside my house.
The design uses traditional embroidery techniques only while the follow-up is more flexible. I finish this Home Sentiment embroidery as a pillowcase. You are free to come up with your own solution like framing the embroidered design as a piece of art. The floor is yours, but nothing says your sentiment to home like making this sweet home embroidery.
The finished size of the design area is 7×14 inches. Transfer the pattern to the fabric and embroider the project using basic embroidery stitches including satin stitch, back stitch, French knots and lazy daisy stitches.
Materials Needed to Make the Home Sentiment Pillow Embroidery
- Two 8×15” pieces of white, 36-count evenweave linen.
- 1 1/3 yards white loop trim or lace edging (optional).
- White all-purpose thread.
- Size 9 or 10 embroidery needle.
- Polyester fiberfill stuffing material.
- DMC Six-Strand Embroidery Floss, 2 skeins of 834 Saffron Medium, 1 skein each of 470 Avocado Medium, 3348 Avocado Light, 3722 Rose Wine Medium Dark, 976 Antique Gold Light, 3755 Delft Blue Light.
How to Embroider the Home Sentiment Design?
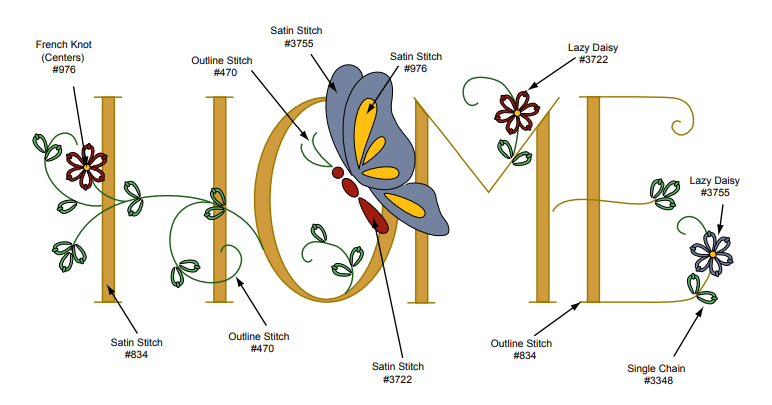
Follow the Home Sentiment Pattern.
Edge-finish both of the pieces of fabric by applying a seam sealant, or overcasting the edges using your sewing machine. Transfer the embroidery design to one of the rectangles of fabric using a water soluble transfer pen.
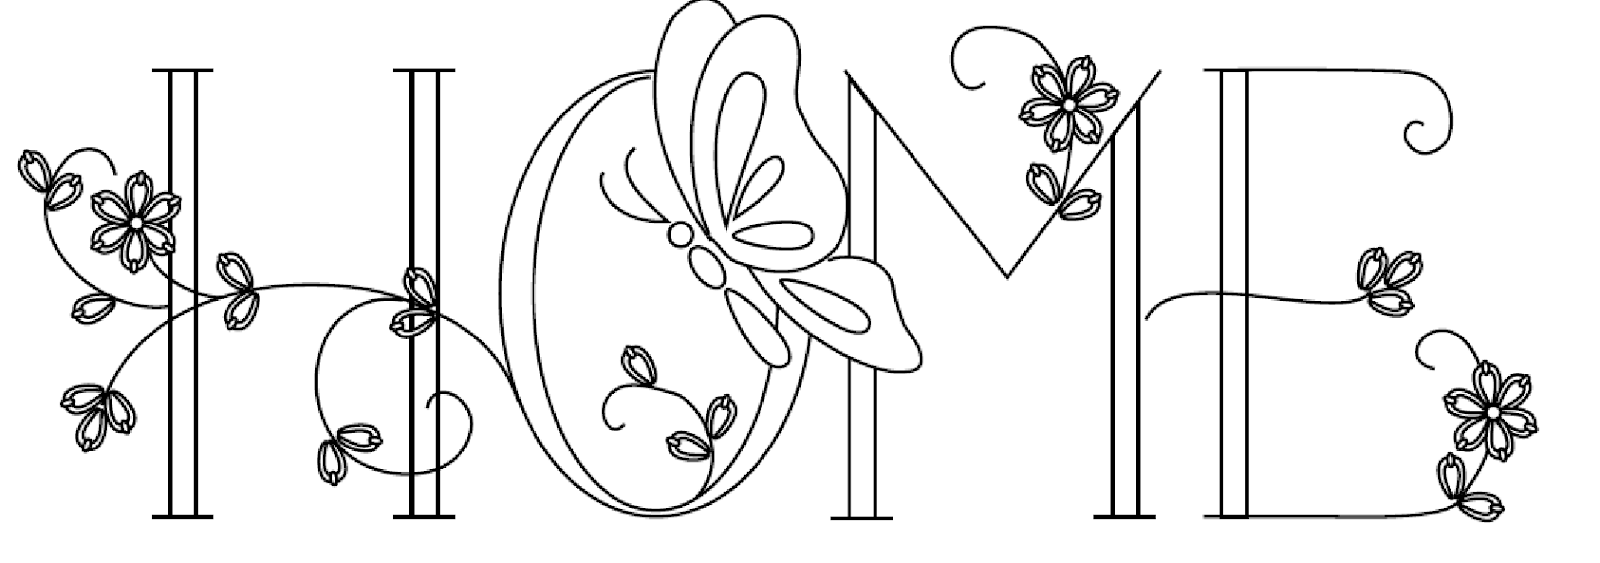
Embroider the design using 2 strands of the 6-strand floss in the needle for all areas, following the diagram in the pattern and working the design using traditional embroidery stitches. For best results, use a laying tool to help ensure smooth satin stitched areas.
After completing the embroidery, stitch the trim to the outside edges of the embroidered rectangle.

Place the embroidered rectangle and the remaining rectangle together, having the right sides facing. Using all-purpose thread, stitch around all 4 sides, leaving a 3-inch opening along the bottom edge of the pillow covering for turning. Turn the pillow covering right-side-out through the opening and stuff. Hand stitch the turning opening closed to complete the project.


